
Measure CNC router spindle speed with SignalScope X
Have you recently purchased a CNC router to make precise cuts in materials such as plastic and aluminum? Does your machine use a standard router, like a DEWALT variable speed router, which has no precise controls for setting the spindle speed?
For each cutting bit and material, among other parameters, it is important to set a proper router spindle speed, measured in revolutions per minute, or rpm. A typical router used with CNC machines, like those available from OpenBuilds, is the DEWALT DWP611. This and other variable-speed routers allow you to adjust the speed with a dial that is labeled with numbers that don’t directly correspond to rpm. The DEWALT router supports advertised speeds between 16000 and 27000 rpm. When cutting a material like aluminum, getting the spindle speed right can be important to a successful cut. So, how do you accurately set the speed of your router for CNC cutting?
One option is to use an optical or laser tachometer, put some reflective tape on the collet nut, and measure the speed that way. However, if you don’t have a laser tach handy, but you do have an iPhone in your pocket, you can measure the spindle speed with the FFT analyzer tool* in SignalScope X which can ‘listen’ to the router with the iPhone’s built-in microphone.
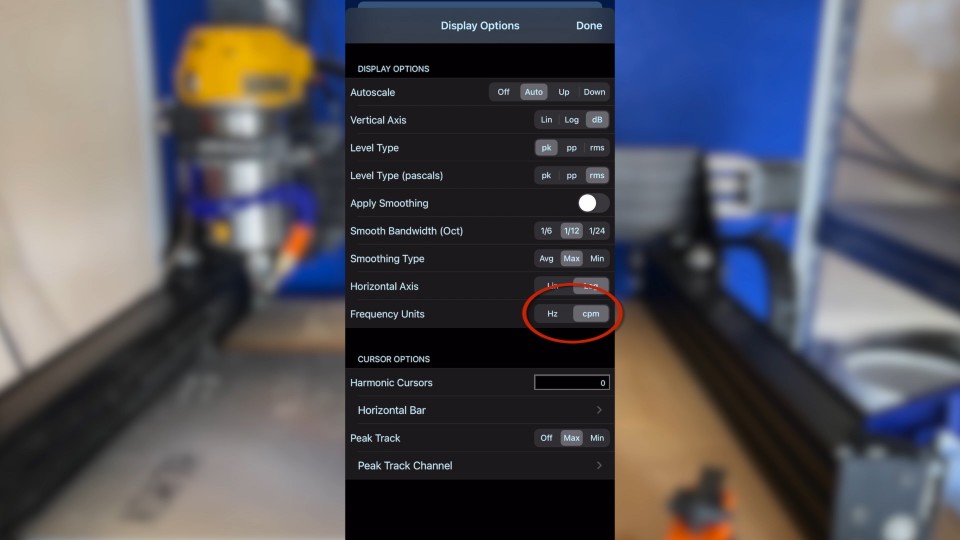
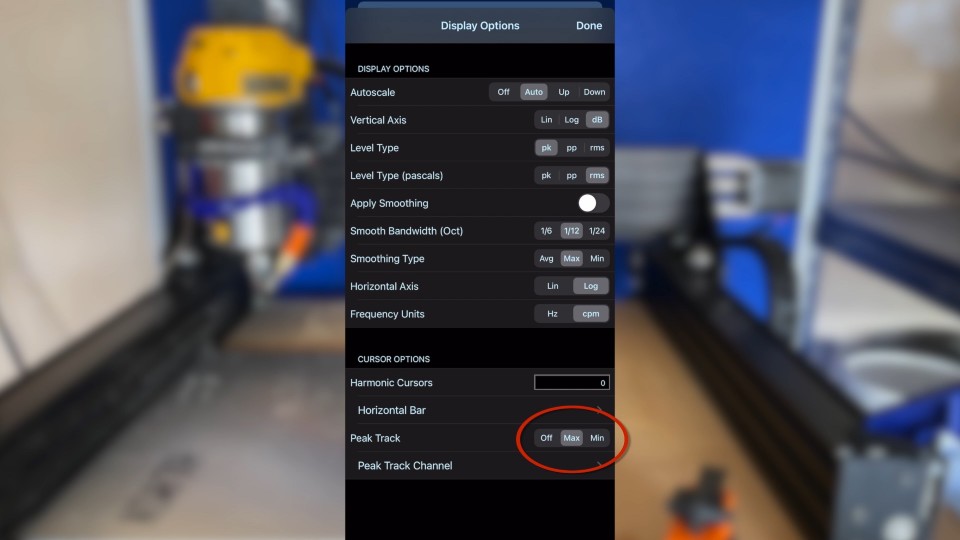
In order to measure spindle rpm in SignalScope’s FFT analyzer, it is best to set the Frequency Units to ‘cpm’ in the tool’s Display Options menu. The 2 options for frequency units are ‘Hz’ and ‘cpm.’ Hz indicates ‘cycles per second’ while cpm means ‘cycles per minute.’ When measuring the sound of rotating machinery, such as a router, cpm corresponds to rpm. While in the display options menu, set the Peak Track type to Max (under Cursor Options). This menu is accessed by tapping the small line graph icon on the right side of the toolbar just above the FFT tool’s spectrum graph.
In the FFT tool’s main options menu (accessed by tapping the single-gear icon to the right of the icon for the display options menu), it is possible to set the minimum and maximum frequency limits of the spectrum graph. It is convenient, in this case, to set these frequency limits to lie just outside the published frequency limits of the router. In this example, the minimum and maximum frequency limits have been set to 12000 and 30000 rpm, respectively. It is also possible to set the desired frequency resolution in the options menu (keep in mind that 1 Hz resolution = 60 rpm resolution).
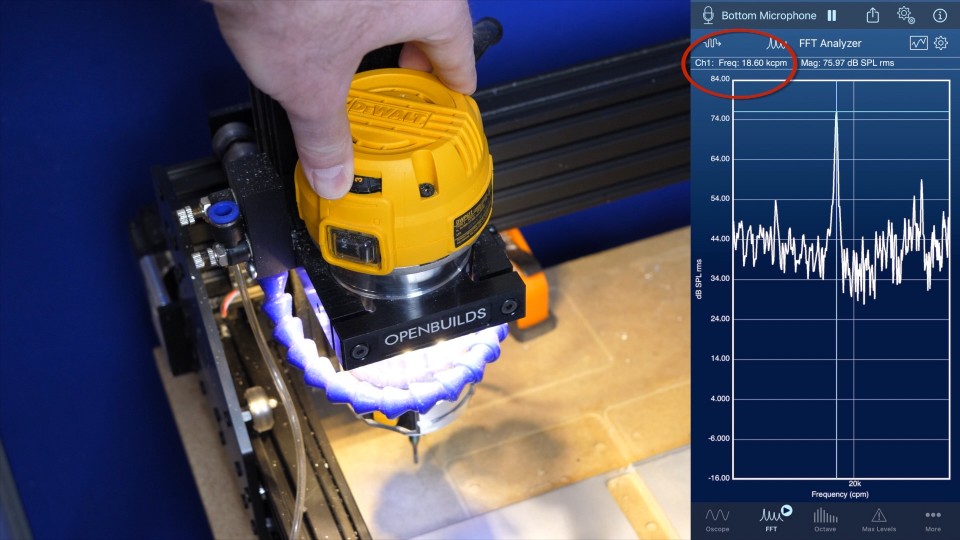
Once you have the FFT analyzer configured, it is very easy to measure the speed of the router. Start the FFT analyzer, start the router, and tap on the spectrum graph to make sure the cursor is on. The peak amplitude in the visible spectrum, as defined by the frequency limits you set, will correspond to the router speed. You can watch the speed change dynamically as you adjust the speed dial on the router.
* Use of the FFT analyzer tool requires a subscription in SignalScope X. It is also available in any of the perpetual-license versions of SignalScope (e.g. SignalScope Basic 2020).
